Sunday, May 17, 2020

Living Quarters

There is the lumber that will build the temporary living quarters.

I am woefully behind on this blog so I'll try to catch you up fairly quickly.

The guy we hired ( who came with glowing recommendations) we ended up firing because he was so painfully slow and inaccurate that he just had to go.  Bob and our friend Keith finished up the job.


 So once we got it framed we had to have it sheetrocked which we ended up doing ourselves because we'd wasted some much time with the guy who came with the glowing recomendations.  It just became about doing the job as quickly and efficiently as possible.
 So there's the sheetrock to do but we also at the same time had to run plumbing lines and electric lines...gotta have water and electricity.  So you do a little electrical ,little sheetrock and then a little plumbing and then a little electric and then it all starts all over again for the next room or rooms.
 We've also been dealing with our dog.  She acquired an autoimmune condition almost a year ago.  About 6 months ago she started to have some issues with not wanting to eat so we had her to the Vet.  They did an ultrasound and saw no masses or anything like that but said the outside of her liver looked strange.  Was this an aging process ( she's 14) or is this another part of the autoimmune disease.  It's called Reactive Cutaneous Histocytosis.  That was about 6 months ago and she had some good months but she has been steadly losing weight and I'm feeding her whatever she wants.  Sometimes its chicken, sometimes plain rice or potatoes, sometimes tuna or turkey.  It's been a struggle to get her meds into her lately and I'm not about to fight her.  Bottom line is that we can't cure what is wrong and I want her last days to be pleasant memories of doing what she wanted and eating what she wanted and not fighting to get pills down.

Thought I'd taken some pics of the sheetrock being done but I guess not.  Then the guy came and did the taping and floating and I went to the store and picked out paint for the walls, ceiling and cabinets.
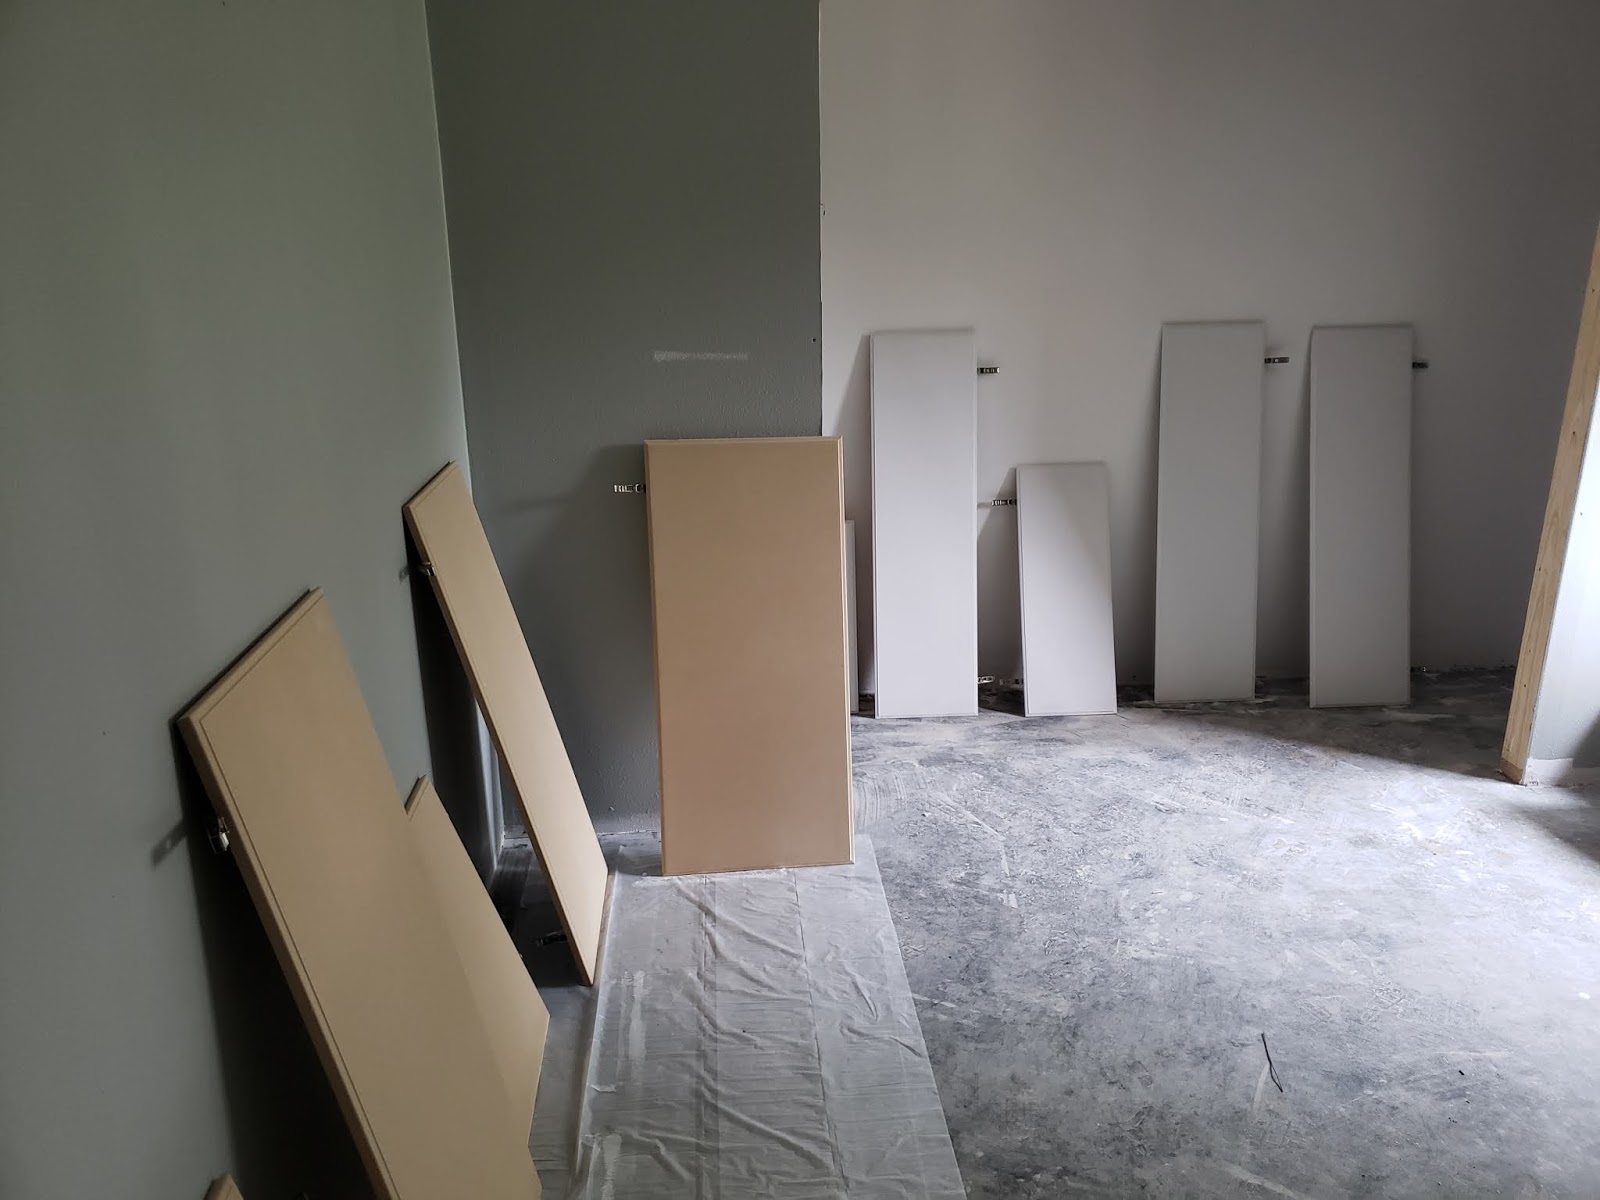
The walls are Granite Dust...it's a real lovely gray color with the trim being white.  The cabinets which I had made in Jarrell, TX are being painted a darker Gray.  I think the name of the paint was like Ultimate Gray.  It just "pops" as the decorators like to say.  But these are pics of the priming and then the painting and then the placing.


In this picture above you see the tall cabinet which is the pantry.  We've actually moved that to the other side of the room and it sits next to the stove.  We had another cabinet built with pull out shelves and that will go where the pantry originally sat.  Makes for a better arrangement all around.


Next 2 pics are of us building the framework for the bedroom closet.  Still trying to decide what kind of door(s) to put on and I think we have it narrowed down to a biofold door with 2 lights with pull chains on the inside.
Here's the before and after sink install.  The picture below is
of the second "bedroom" which is Bob's Hobby Room.  He was able to scroung a bunch of old fencing and some old tin.  The fencing became the walls and the tin is the ceiling.  Makes for an interesting room.  This will have all our game mounts on the walls and the room will hold his bow bench (for all his bowhunting equipment) his gun reloading bench (for all his gun related stuff) and his flyfishing table (for all his flyfishing supplies and fly building material).  The room is quite dark and we may end up cutting in a window....but that's not something that needs to be done immediately....and we want to put in a different kind of light fixture and that also does not have to be done immediately.  Next pic is of the bathroom.  What can I say....it's a bathroom.
Some of you may be wondering what type of treatment we had done to the floor.  It looks pretty neat in the pictures...well, sad to say that this is just left over from when the tape and float guys did their work.  Most people don't ever see this cause it's covered up by wall to wall carpeting but we aren't going to have anything but area rugs and I can only get down on my hands and knees and scrub so much at a time.  It's getting clean but it's taking it's time.   Last pic above right is the outside wall of the living quarters.  It's actually inside the shop....looking at this picture one of our 3 overhead doors is directly to your right....I have another picture somewhere that shows you if you are confused.  And you can also see in this picture that we have made good use of the used tin and fencing.
I think part of the reason that I don't have all my pictures together is that somewhere in the midst of all this choas I got a new phone and then the "Pandemic" happened and I couldn't get to the phone store to have them transfer everything from one to the other.  Even the cloud stuff didn't transfer automaticaly....I don't know why but it didn't...Hopefully soon I will be able to get that done and this blog will recognise this new phone and I can just transfer from there.  Hopefully.

Sunday, February 23, 2020

Insulation

The foam insulation guys were here yesterday and finished up today.
This is what the inside of their truck looked like.
There are a couple of 55 gallon drums filled with " stuff" on the other side of this stuff.  Somehow it all gets mixed and then sprayed on as you will see in the next video.
That foam is amazing in its growth capacity.
We have to let this stuff " cure" for a couple of days and then we will go back in and start installing the overhead lights and also finish connecting the plug boxes. 

We've had the next contractor come in and do all the measuring for the living quarters so we are just waiting to hear back from him.  Hopefully soon as we'd  like to get out of this house and put it on the market asap.

Tuesday, January 28, 2020

Welding Shop/ Temporary Living Quarters


We are almost finished with the tin on the building.  Unfortunately we were 3 sheets of tin short for the overhang.  Since they need to go on before the roof tin, that's why there are sheets of tin missing on the roof as well.  We also need to have the end wall finished.  This all happened on Friday.  Our tin guy said they would be back this week to finish up and we kinda expect that they will be there tomorrow. 
We have electric rough in to complete before they come back to do the insulation which will be first week in February.  As soon as they get started we will give a heads up to the contractor who will build our temporary living quarters. 
So good progress...we had hoped to begin moving stuff in by my birthday which is next week on Thursday.  Not going to happen but you gotta learn to go with the flow or it will drive you crazy.

Sunday, January 19, 2020

Electricity and Plumbing


 We've  had a very productive couple of weeks.  We were able to get all our trenches dug for the electrical lines and water.  Septic tank connected and all the lateral lines that go with it done.  Electrical lines put into conduit and pulled from box to far side of shop/living quarters.  Water connected (no leaks!!) all the way to where it enters the shop/living quarters.
Tin guys were there on Wednesday but rain arrived and they left.  It's fairly dangerous to try and put up tin in the rain.  One slip and you've lost a hand..or foot or severed a major artery.  We had rain up until Friday morning and hoped they come back maybe on Saturday but they did not.  Pretty sure they will be there tomorrow and they will finish putting the end walls up, the roof and the overhang.  It's possible that by the end of the day tomorrow we have a dried in building...Pretty exciting stuff! 


Tuesday, December 31, 2019

Living quarters/welding shop

We had to wait 5 days for the slab to cure before we could begin any work on it.
But Bob and I got to work just as soon as was possible.
In order to save money where possible, Bob took on the job of framing the building himself with friends helping out when possible.  Being a welder for over 30 years does have it's advantages.


December 31, 2019....all the overhead doors are up and we are just waiting for Jose'.  He was supposed to be here last week but he got behind on another job.  We had hoped to have tin on sides and roof before the end of this year but that's not going to happen.  Most frustrating thing about building is waiting on other people.  Happy New Year readers and hopefully by this time next year we will be out of these temp quarters and into the new house.

Thursday, November 28, 2019

Foundation

Well, lookie, lookie.....we arrived at the property to see this...
That my friends is the beginning of a foundation.....we are moving along.  This is the begining of the slab.
For those that aren't familiar with just how a slab is built...let me explain.  A simplified version as you will.
First you decide where you want to put it....now for monetary sake ideally you want to find as flat a place as possible...that's because the more uneven the site...the more the whole thing is gonna cost....more fill, more concrete = more money.
So what happens first is you figure out where you are going to build.  Then you hire a concrete contractor who has a crew and they take over.
The shoot the site for level and then they place what they call batten boards up in four corners.  You see those in the foreground of this shot....it's to the left of the sight level....3 boards vertical and one board horzontial.  On to that vertical they put in a nail and on that nail they tie a string....that string is run from one corner to the next ....this becomes a rough area of where within they will build.  Lots of measurements are taken and they decide with the measurements of what you want how to put up the boards that will hold in the concrete to form the slab.
There are 2 kinds of slabs....one has a grid of rebar that runs all the way through it....the other is done with a couple of trenches and wire cables placed within.  The rebar is an old fashioned way and although the cable kind has its advantages...we prefer to have the old fashioned rebar.

These two pictures above just show the foundation from a different angle.
After they get up the outside boards and supports the bring in fill called "screenings" to level up the pad.  It's not exact but its pretty close.  Kinda amazing.
After they shoot it again with the site level they are ready for plastic and the rebar. 
There it is, ready for the concrete trucks.

Ain't she a beaut!  There she is in all her glory.  Lots of troweling going on after this is all said and done.
I just thought that I'd insert this video in case no one as ever seen a concrete pour. 

The slab has to "cure" for 5 days before you begin to work on it.  So this is day 5 and we are going to start building the framework for the shop/living quarters.
Corner posts are up and we've just begun to add the center posts.  Next picture shows just more of the framing.
The vertical picture is of the 2 rafters that will be evenly spaced from each end.  The end  rafters are made out of something completely different. 
Last picture is just more of the framing. 
The next thing we will do is rent a lift to begin placing the rafters.  Once all the rafters are placed we begin to put on the purlins.  Those are the supports that go between the rafters.  After those are placed we can begin to put the tin on. 

Monday, November 18, 2019

The Well

This is a momentous day.  That's the well guys truck.  Yep, we'll have water soon!
That's Charlie Ward.  One fine individual.  We had his father first as our well man and Charlie was always his helper.  When Leroy passed away Charlie took over the business.  A good well man is hard to find, but when you've got a great well man you thank your lucky stars.

The person in the purple shirt is Charlie's wife Stacy.  She helps Charlie out from time to time.  Today was Sunday and we did not expect to see them out here today.  And when they drove up we told them to head back to the house...it was Sunday after all and they needed to be home with their family.  They insisted on staying and getting some work done.
That long silver thing is a water well pump...not what you expected I suspect.  Neither did I when I first saw one but that's what that is.  Now you know.
If you blow up this picture  a bit you can see that they are putting the sticks of pipe together and putting them down the well hole.  That's how it all works.  The silver cylinder is attached to the first stick of pipe along with all the wiring and when they get to the end of the pipe (one end of the PVC has a coupler and one end is threaded.) they thread on another one, attach the wiring and so on and so on.  Interesting....isn't it.  So much is taken for granted when you live where all you do is turn on the tap.  But somewhere down the line....this is how it begins.
Here's a look at the inside of the building.....

Ok...going left to right...white PVC pipe at the bottom of the picture  is coming out of the cistern...the cistern holds water that comes directly from the well.  That pipe then goes to a Pressure booster pump, that's the greenish thing and from there it goes into the pressure tank (That's where your water pressure is made). And then from there the water is diverted to ( right now just to a water trough for the cows) the house, shop and outside faucets. 
I know this looks kinda messy but there is a method to the madness.  Ignore ( for now) all the stuff on the ground and concentrate on the boxes on the wall.
First box closest to us is the breaker box for the well itself.  The next box beside that is the Well Control Box.  It has the starting capacitor in it.  And the last box is a safety measure for that " just in case" moment.  One of those " just in case" moments is if the water in the well itself should drop below the pump then it shuts off the electricity to the pump in the ground.  That way you won't burn up your well pump if there is no water.
And there you have it...water from the hole in the ground to the surface.